Showing posts with label Cooking/Baking. Show all posts

Sunday, November 11, 2018

Toasted Meatball Sandwiches

Toasted Meatball Sandwiches - In the air fryer.

Ingredients:
Meatballs
Tomato Sauce
Italian Cheese Blend
Buns

Every now and then I get a hankering for things I honestly really never ate before. But I think it’s cause I can’t eat it, that I want it. So scrolling thru Pinterest I saw a recipe for Toasted Meatball Sub Sandwiches, and they sounded tasty. I got meatballs, Udi’s Buns (Most common in our area), Sauce and Cheese. I decided to try the meatballs in my Air Fryer, to see if it helped reduce the greasiness of the meatballs. (It did!)


I got the Carando Meatballs, they’re in the butcher section of the grocery store. They’re fresh, not frozen so it helps expedite making dinner too. I’ve heard some people say they have issue with them, but I’ve not experienced any issues, they are labeled Gluten Free on the back. I will say, having made them in a pan, they’re greasy. Which can cause me stomach discomfort cause of my poor gall bladder. I was happy I found a smaller jar of spaghetti sauce, since I don’t like drowning my food in sauce, it was the right size for 3 meatball sandwiches!
I put them in the air fryer at 370 degrees for 16 minutes. With about 5 minutes left I took them out, cut them in half and put them back in for 10 minutes. They came out nicely cooked, and there was a pool of grease in the bottom of the air fryer.

I placed 3 Udi’s buns in a corning-ware dish, and put some sauce in the bottom of the buns, a pinch of mozzarella cheese and then placed the meatballs in the buns, covered with more sauce and a slice of cheese.

I baked for 20 minutes at 350 degrees.
I could have baked longer to make the bread crispier, but they turned out so tasty!

Thursday, November 8, 2018

Getting Ready for the Holidays!

Holidays are stressful, there is no doubt about that. Trying to get everyone together and have a nice family meal isn't easy! Especially if you're blending families or traditions, people get passionate about grandma's recipe, or their tried and true way to make something. 
But the moment you introduce a food allergy it changes things - and not everyone is willing to work with that change. It's easier for those of us who cook gluten free every day to adapt, but not always easy for those who love us but don't cook gluten free to adapt or fully understand. 
Try to keep calm, address the situation early and let the host know that it might be easier for you to bring your own food, so don't be offended if I don't try your great grandmother's tried and true amazing stuffing, I can't. 

Another thing to keep in mind is people may sneak flour into dishes you traditionally wouldn't, so always double check! Growing up we always made gravy with cornstarch, so my mom was befuddled to know that people use flour now a days! Her mom only ever used cornstarch, so it never crossed her mind that traditional gravy would be off limits for me now. 

Here are some products to help streamline shopping and finding what you need to make your holiday a success! - Check their site for shipping or store availability in your area. Amazon and Gluten Free Mall may also be useful so you're not driving around for hours trying to find a store that carries these products. 


Gluten Free stuffing Brands –
Trader Joe’s – Check local store for details.
Aldi’s – Check local store for details.

Gluten Free French Onions –
Aldi’s – Check local store for details.
Sprouts & Wild Harvest – Check local stores for details.

Gluten Turkey Brands –
Keep in mind - Stuffing the bird with glutenFULL stuffing will contaminate the turkey! So if your family insists on stuffing the bird, bring some gluten free stuffing to do so! 

For all of these if you have questions reach out to the manufacturer - (The earlier the better) for questions on processing or anything else. 

Jennie-O - Do not use the gravy that comes with it. - https://www.jennieo.com/products/collection/3-gluten-free 

Since some of you probably also want some gravy for your turkey and heck probably for the stuffing too: 

Gluten Free Gravy - 
Swanson's Turkey Gravy - Does not list gluten - But is not labeled gluten free, due to processing and potential for Cross Contamination. - https://www.campbells.com/connect/faq/ 
Any gravy made from scratch can be adapted using corn starch in place of flour, or a gluten free flour, though some work better than others. 

Gluten Free Pie Crusts - 
Whole Foods Bakeshop - Check local store for details.

Pie Crust Mixes:


Hopefully some of these will help make your holiday meal prep easier and less stressful, so you can sit back and relax and enjoy some time outside the kitchen. 

Air Fryer Taquitos

I have to start by saying I LOVE Anything with Buffalo Sauce, so I had to make these with buffalo sauce. 
These were quicker and easier than I expected, and super tasty. Now only if my Air Fryer fit more than 5 of these at one time. Before starting spray the basket with cooking spray, before you place the tortilla rolls in.

As with any recipe, be sure to double check all ingredients for gluten. Most commercial blue cheese is gluten free, but be sure to check. Taquito's usually use flour tortillas, I used White Corn tortillas instead.

Ingredients: 
1 - 10oz can of Chicken
1/3rd Cup - Buffalo Sauce
1/4th Cup - Blue Cheese Crumbles
1 - 8oz Package Cream Cheese
1 - Package Corn Tortillas

Directions:
  • Make sure the cream cheese is room temperature.
  • Make sure the chicken is more finely chopped, as well as the blue cheese crumbles.
  • Mix the Chicken, Buffalo Sauce, Blue Cheese, and Cream Cheese in a bowl until well combined and set aside.
  • Scoop a heaping spoon of the mix on one end of the tortilla and spread it the length of the tortilla.
  • Roll the tortilla and place seam down in the air fryer, and give a touch of oil on the top
  • Cook at 370 degrees for 12 minutes. 
Totally Awesome - Really wish my air fryer made more at once, though it not making more is probably better for my waist line! So good, and quick snack option.


Friday, March 30, 2018

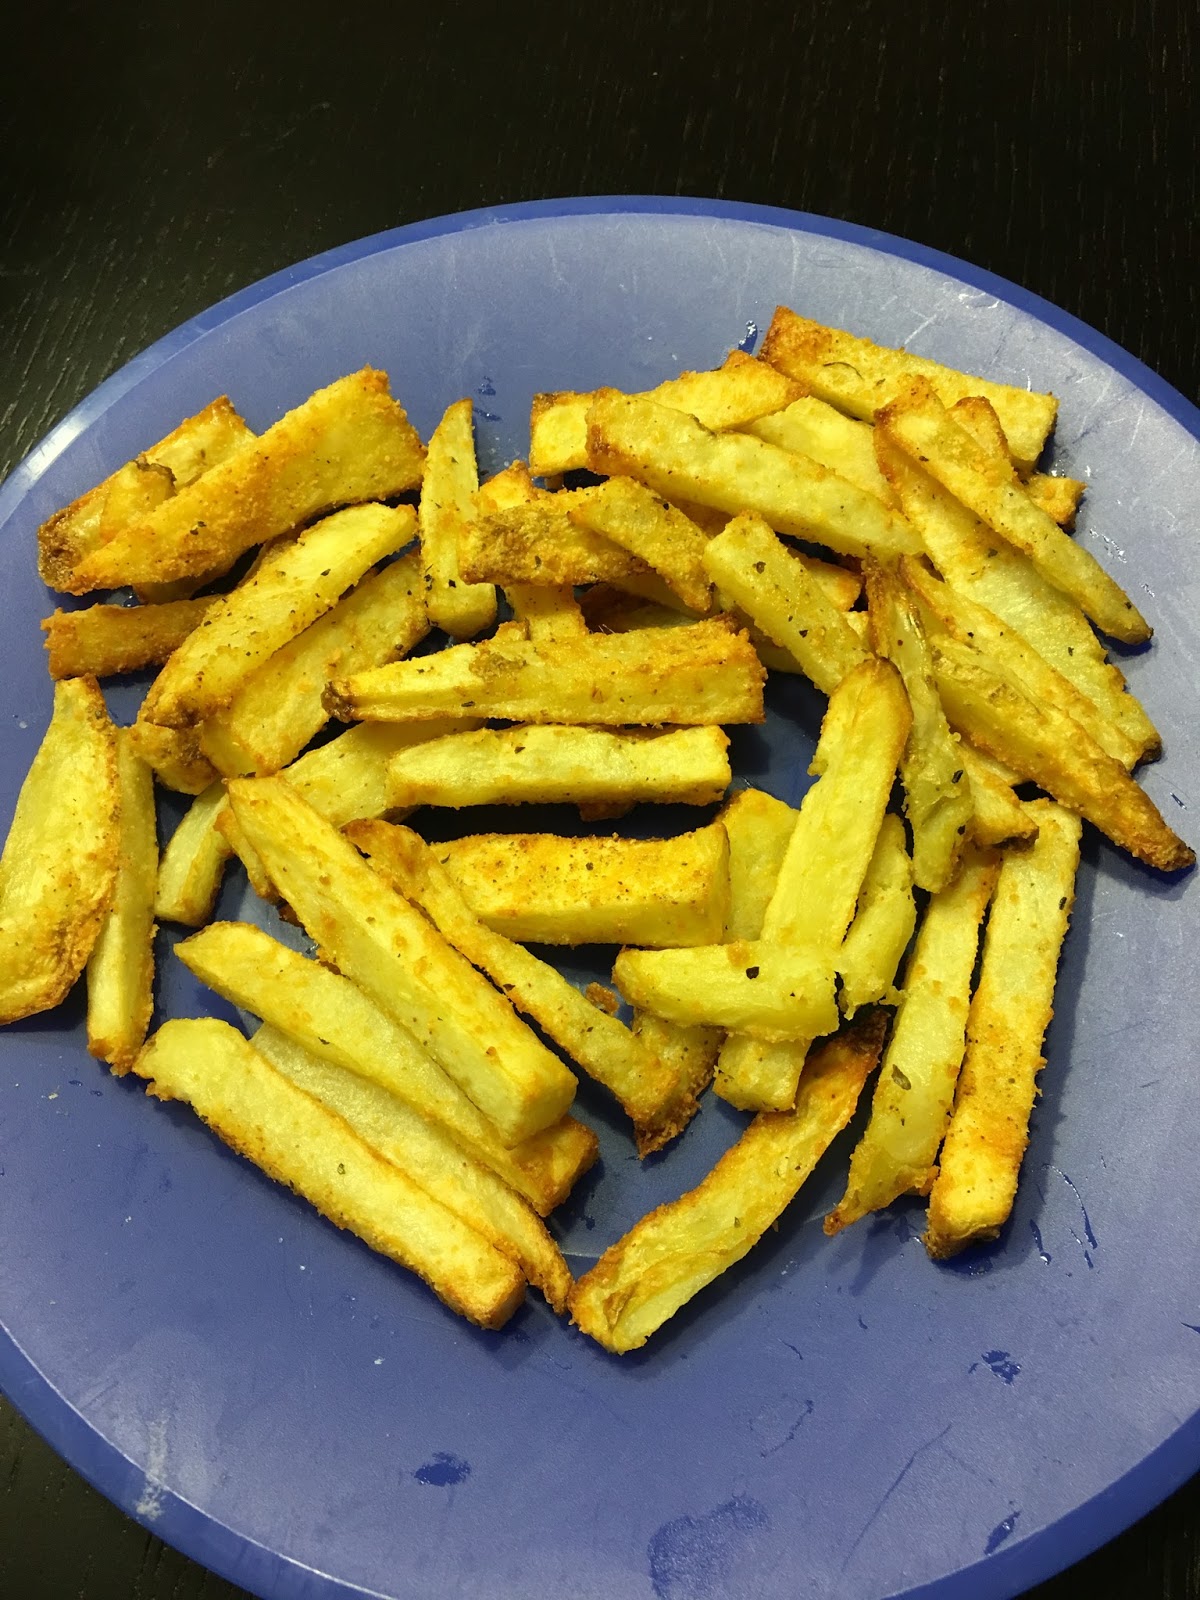
Air Fryer Garlic Parmesan French Fries!

I'll admit this is the first time I made French Fries from scratch. My mandolin only does hash browns so I had to manually chop the potatoes for this, which wasn't that difficult.

Ingredients:
2 Baking Potatoes
2 Tablespoons Vegetable Oil
1 Tablespoon Garlic seasoning
1/4th Cup Grated Parmesan cheese

Directions:  
Peel the potatoes and chop in half width wise. Chop each half into smaller "French Fry size" pieces and toss in a medium size bowl. You will sprinkle with the oil and mix the potatoes well. Coat potatoes with seasoning and cheese, and toss into the air fryer basket. 

I cooked these at 370 degrees in the air fryer for 15 minutes, shake up the basket and set for another 15 minutes. I checked after 8 minutes, shook the basket again and let it finish up the other 7 minutes.

They turned out really good. It was only after this I was reading the cookbook that came with my Air Fryer. (I was to excited to use it I forgot to read the cookbook) I saw that they recommend you soak the potatoes in water for 30 minutes before cooking. I felt like you could skip this step, especially if you like your fries crispy but like steak fries.

Wednesday, March 21, 2018

Gluten Free Cream Cheese Brownies

Ok Honestly, these are my new favorite brownie recipe! I do love nice crispy brownie edges, don't get me wrong. But these are Too delicious to pass up! I adapted this recipe from Betty Crocker. Though Since I'm not a fan of their gluten free mixes I used a different mix. Worked just as well with this mix. 

Prepare the brownie mix as directed on the back of the package. Though this said use an 8x8 pan, I used a 9x9 pan. These were super tasty brownies and honestly everyone at the party loved them!


Ingredients: (In addition to brownie mix ingredients) ~ 

6 oz. Cream Cheese softened
1/3 Cup of White Sugar
1 Egg
1/2 teaspoon Vanilla Extract

Directions:

Mix all ingredients, Cream Cheese, Egg, Sugar and Extract together until creamy and no lumps remain in the mix.  

Pour the brownie batter into a greased 9x9 pan. 
slowly pour the cream cheese mix over the top of the brownies slowly swirling the mix into the top layer of the brownie mix. 
Once the cream cheese is poured over and mixed to your desire, place in the oven and bake at 350 degrees for 40 minutes. Check to make sure the mix looks done, If not add an additional 5-8 minutes. Once done, let them cool and keep in the fridge until ready to serve. They will not disappoint! 

Wednesday, March 14, 2018

Gluten Free Mozzarella Sticks

Let me tell you, this was a trial and error experiment. 3 rounds and I finally almost have got it. I probably would have had it, but I pulled the basket out the last time and could have left it another minute.

Ingredients:
1 Package Mozzarella string cheese sticks
1 Egg
1/2 Cup cornstarch
Pinch of Garlic Salt
1 Teaspoon Italian Seasoning
1 Cup GF Bread Crumbs

Directions:

You're going to want to cut the string in half so you can make 2 mozzarella sticks per single wrapped stick. You'll want to have 3 bowls set up 1 with the corn starch and garlic in it, 1 with the egg and 1 with the bread crumbs and Italian Seasoning. You're going to want to dip each stick in the corn starch, then the egg, then the seasoning. If you want you can dip back in the egg, and back into the bread crumbs for a more crunchy texture. Once you've dipped all of them thru the mixture you will want to toss them in the freezer for a bit to firm them up before frying.

Ultimately I made these at 400 degrees for 9 minutes, after 5 minutes I checked on them and turned them over and cooked for 4 more minutes before pulling them out of the fryer. 


Wednesday, March 7, 2018

Gluten Free Coconut Shrimp

I’ve used this same recipe for both baked Coconut shrimp as well as in the Air Fryer. I used Kikkoman Panko crumbs for the best results on these.


Ingredients:

1 lb large shrimp, peeled and deveined raw
1/3 cup cornstarch
1 teaspoon Garlic seasoning
1 teaspoon onion salt
1 cup flaked coconut
½ cup panko bread crumbs
2 eggs, beaten well
3 small/medium bowls 

Directions:

Wash, peel and de-vein shrimp and pat dry.

Place cornstarch in a bowl by itself, also put the eggs beaten in their own bowl. In the final bowl mix the bread crumbs, coconut, salt, garlic and onion seasoning.

You’ll need to cover each shrimp with the cornstarch, then dip in the egg, and finally cover in the bread crumb mix. 

For baking, place each shrimp on a baking sheet and spray with a bit of spray oil, (I use Grapeseed oil). And bake for 20 minutes at 400 degrees.

For the Air Fryer place the shrimp on a plate, spray with the oil and place in the deep fryer, I fried mine at 350 degrees for 15 minutes for raw shrimp and only 8 minutes for cooked shrimp

Friday, February 23, 2018

Air Fryer Fun! Gluten Free


I got an Air Fryer!! Ok this was super exciting to me, cause of 2 reasons, having Celiac, fried foods when dining out are off limits, minus those few place that “happen” to have a dedicated fryer, that are far and few in between, and usually pricey. Secondly I have issue with my Gall Bladder being slow, so using a traditional deep fryer is a bit rough, on my gut. Gall bladder attacks are not fun, and have landed me in the hospital twice now.

I’ve learned it’s more than just fried foods you can make in an air fryer, similar to my favorite kitchen gadget, the Pizza Pizzaz, the Air Fryer can make foods you’d normally make in the oven, without firing up the oven and making the house hot! Even items as simple as Ore-Ida French fries, without oil, come out crispy and baked.

Since shrimp was on sale the first weekend I got the Air Fryer, we started with Coconut Shrimp. So good. I’d baked coconut shrimp a few weeks back, (Last time shrimp was on sale) this was better. 

I had some Aleia’s Italian bread crumbs still in the cabinet, but rather low, I’d also bought Kikkoman Panko crumbs also, of the two, we really liked how the panko crumbs turned out. So we’ve gone from NEVER eating seafood, to eating coconut shrimp whenever shrimp is on sale! Like anything there are good and bad recipes that require trial and error here. We also tried a Blooming Onion in the fryer, and that well, fell short. It was not “Outback” worthy, but I’ll keep roaming for new recipes to try for this. Mozzarella sticks, also fell apart on me, and I followed the recipe to a T! So I’ve found another recipe to try out.

Click here to get both Coconut Shrimp Recipes, (Baked Or Air Fried!) and check it out. I do feel which bread crumbs you use is important for consistency and flavor. We used different bread crumbs for the mozzarella stick than the shrimp for consistency. 
  

Tuesday, February 13, 2018

Quick Chicken 1 Pan Dish

This was so easy to make, I'm shocked I didn't think of this sooner. Great quick 1 pan dish for dinner. Feel free to add other ingredients for other tweaks. Spinach is a good extra to add to this as well.

Ingredients: 
1lb Chicken Breasts
1 teaspoon of Chopped Garlic
1 teaspoon onion powder
Dash Paprika
1/4th Brick of Cream Cheese
1 Cup chopped Mushrooms
1 teaspoon vegetable oil

Directions: 
Grill the chicken so it's fully cooked. While the chicken is grilling, saute the mushrooms with the garlic and vegetable oil. Once the chicken is cooked, add the chicken to the pan with the mushrooms and garlic, add the Onion powder and paprika to the pan and cook until fragrant. Chop the cream cheese into smaller cubes and place in the pan with the chicken and mushrooms. Stir until all the cream cheese is melted and well mixed up. You can add more cream cheese if needed for more "sauce". I also tend to mix  this up with different seasonings depending what flavor I'm looking for that day.

Wednesday, February 7, 2018

Chicken Broccoli Casserole

Here is a great, dump and go casserole for after work. I made this the first time and didn't add much seasoning, the 2nd time I spiced it up. What's great is you can add any savory seasonings of your choice. Finding good gluten free cream soups, heck gluten free cream soups in general are impossible. I used Imagine broccoli cream soup this time. You will need a 9x13 baking dish and some foil for baking. It seems like a lot to make this, but it's really not.

Ingredients:

1.5 lbs chopped raw chicken
1 Cup uncooked rice
1/2 a brick of cream cheese
1 Cup Shredded Cheddar cheese
1 Bag frozen broccoli 
16 oz Cream soup
1/2 Cup Water 
1 Teaspoon garlic
1/2 Teaspoon Thyme
Dash Onion Powder
Dash cayenne pepper 
Cooking Spray


Directions:
First off spray the bottom of your pan with Pam (Or like spray) Pam Original, (non-baking spray) is gluten free. Next you want to chop up your chicken, and set it aside. Mix the cream soup, cream cheese and water together and pour into the casserole dish. Next place the chicken, rice and broccoli in the dish and mix it up real good. Add in your seasonings, plus any others you like to add to chicken. Next mix in the cheddar cheese and sprinkle the top with any extra. Make sure to cover Tightly with foil and place in the oven at 350 degrees for 1 hour. After popping this in the oven I decided to do my workout/yoga session, I had 60 minutes to spare!

Monday, January 15, 2018

Gluten Free Empanadas


I love these, but they are time consuming from both finding the mix to making them. But they are super tasty and everyone asks for them come the holidays so I’m going to try and make time to make these more often thru the year. They do freeze well so you can stock up on these and bake as needed. You can choose pretty much any filling for these, I like steak and green pepper with mozzarella, buffalo chicken with blue cheese or spinach and mushroom with cheddar.

Ingredients- Dough:
2-3 boxes of Chebe Focaccia Mix.
2 TBS olive oil,
4 TBS milk
1 cups strong shredded cheese (Like cheddar or similar)
2 large eggs

Filling & Directions:
You choose, I like canned chicken, shredded with Franks Buffalo Sauce for quick recipes. Steak and peppers using Steak-Um’s and diced peppers. Prepare the filling and place off to the side to cool so it’s easier to handle. I put a pinch of whatever cheese at the bottom and place more filling on that, and fold over to seal and close off the ends with a fork.

Prepare the dough based on instructions on the box. Roll out the dough between two pieces of parchment paper. Use a large cookie cutter, or large cup to create a circle piece of dough. Slightly flatten with your hands before you place filling on one side of the circle, so that you can seal them in half moon shapes. 

Freeze until you’re ready to consume, or bake for 20 minutes at 450 degrees. If frozen, bake for an additional 15 minutes or until they look nice and crispy. 

Monday, January 1, 2018

Wine Gummies!

This is a new party favorite of mine, and it's pretty easy to make! I got some Lego silicone ice cube trays for Christmas. So I used those this time. I do have a kit for making Snoopy gummies that I've used previously also. The one thing I wish I did have for these is an eye dropper to make this less messy, but a deep ladle of a spoon works too. 


Ingredients:

1/2 Cup Wine of your choice.
2.5 TableSpoons (or 2.5 packets) of Knox Gelatin
1/4 cup white Sugar

Directions: 
Place 1/2 cup of wine in a sauce pan, and heat on medium heat. Be sure wine gets warm, but does not boil. While wine is warming pour in the gelatin mix, being sure to whisk the entire time so the gelatin doesn't start to clump while pouring in.
Once all the gelatin is mixed in and dissolved into the wine mixture, start slowly adding in the sugar, again maintain whisking the mixture so the sugar doesn't clump. Keep doing this until the liquid is clear again and not clumped with sugar. 
Some more sparkling wines will get a foamy residue at the top, that's fine, that will show up in your item but doesn't change the taste. 
Once your liquid is clear not cloudy, turn off the heat and quickly spoon the mix into silicone molds. Or if you have an eye dropper, you can use that to fill the molds. You must work quickly cause the mix will start to harden once the heat is removed. 

Place the molds in the fridge for 20-25 minutes before you remove the shapes from the mold to serve. They can be kept in the fridge or at room temperature. The ones below were in the fridge about 30 minutes before removing them from the mold and placed in a bowl for serving. Be sure if wine has not boiled they will have alcohol in them, so please make sure to only serve to the adults at your party!

Thursday, November 9, 2017

Chili Dog Casarole

This is a super easy meal that honestly anyone can make. I made this the other night, as the temperatures were turning colder, and I had an errand to run. Started this, threw it in the oven as my fiance got home, and told him to pull it out when the oven dinged! Super easy and I was home right after he pulled it out. Turned out amazing. 


Ingredients:

  • 3 Cans Hormel Chili with beans. (Careful the Hormel Chili w/o beans is not Gluten Free!!)
  • 6 Hot dogs, chopped up
  • ½ a bag of Ore Ida Tater Tots
  • 1 package shredded Cheddar cheese
  • Optional: Sour Cream

Directions:

  1. Take a casserole dish, 10x10 or so in size, pour in 1 can of chili and evenly spread on the bottom of the dish.
  2. Next layer in 3 chopped up hotdogs, and top with the 2nd can of chili.
  3. Repeat this step one more time, layering the rest of the hot dogs and the 3rd can of chili.
  4. Sprinkle the top with cheddar cheese.
  5. Next layer Tater tots laying on their side to cover the entire dish, and sprinkle with some more cheese.


Set the oven to 370 degrees and bank for about 45-50 minutes. When you take it out it will be bubbly and hot. I served it up in bowls, and added extra cheese to the top. If you like you could even add a dollop of sour cream to the top!


Wednesday, September 20, 2017

Beef - Cheese & Potato Casserole

I was in the mood for something different the other day.. wasn't sure what exactly but I wanted comfort food. this reminded me of a knock off Hamburger Helper dish that my mom would make regularly back in my Not Gluten Free Days. It was pretty easy, the time consuming part was slicing the potatoes, cause I don't have a mandolin. But I do have one on my wedding registry now! 

Ingredients: 
1.5 lbs Lean Ground Beef
6-8 Slices of Bacon
1/2 Cup Chopped Onion
1 tsp Minced Garlic
1/4 tsp Ground Black Pepper
4 Large Baking Potatoes Sliced Very Thin
1 Can Cream of Mushroom Soup (I used Progresso)
1/2 Cup Beef stock
2 Cups Shredded Sharp Cheddar Cheese


Directions:

Set the oven to 350 degrees and grease your 13x13 baking dish.
Brown the ground beef and cook with the onions, garlic and pepper.
Mix in the 1/2 cup of beef stock and set the mixture aside.
You can use the same pan from the beef to fry up the bacon until crispy. 
Once fried, crumble the bacon in to small pieces and set aside. 
Slice the potatoes super thin. (If you have a mandolin that will be the best option, if not slice thin and watch your fingers!!).
Layer half the potatoes at the bottom of the dish covering the entire bottom. 
Pour half the soup (not cooked) over the top of the potatoes.
Next layer half the beef mixture over the potatoes, and top with 3/4ths cup of cheese.
Repeat this process with another layer of potatoes, soup, beef this time include the crumbled bacon and 1 cup of cheese.

Cover the top of your baking dish with tin foil and place in the oven for 80 minutes.  
After the 80 minutes pull the dish out of the oven and sprinkle with the remainder of the cheese. 

I sliced and served similar to lasagna and served with a side of veggies.
This was a good dish for 2 meals for us, and one I'll do again for a nice different comfort food meal!

Wednesday, May 11, 2016

Easy Philly CheeseSteak Stuffed Peppers

I have to start of by saying I LOVE Steak-umms. I'm so glad I found out they are gluten free!! What's great about using Steak-umm's is how easy this meal was to make! It was pretty much a 30 minute meal, from start to finish.


Ingredients:  
2 Large peppers
1 Cup shredded mozzarella or provolone cheese
3 cloves garlic minced
1 medium onion, chopped (Optional)
1 cup diced mushrooms
1 package of Steak’Umms
2Tbs olive oil OR
2 Tbs of unsalted butter
Dash of salt to taste
Dash of black pepper to taste 
Dash of Onion Powder 


 Set the Oven to 425 degrees. 

1 - Heat a frying pan with add the Olive Oil or butter, and minced garlic. Cook for 2-3 minutes until the garlic is aromatic.
2 - Add the Mushrooms and Onions to saute for 10-12 minutes. 
3 - While the mushrooms are saute'ing cut off the top of your peppers and clear out the seed. If you're not as hungry, you could cut the peppers in half and make half portions of peppers.
4 - Once the Mushrooms are nice and soft add the Steak'Umm slices one by one, breaking them up into pieces as they get hot.
5 - Once the mixture is the amount of meat to mushroom consistency you want, turn off the burner.
6 - Sprinkle a layer of cheese in the bottom of the peppers, then layer 2 spoons of the mix on top, alternating between cheese and meat on each layer. 
7 - Finish the top layer with cheese and pop into your baking dish, and place in the oven for 15 minutes. Since the mixture is mostly cooked you'll only have to cook 15 minutes to soften the peppers and help melt the cheese mixture.
8 - Enjoy!


A look on the inside of doing a whole pepper. I feel like I could have added more steak, but this was still Very Filling, and so good. Any pepper will do the trick. The second time I made these I used Enjoya peppers. They are tasty and complimented the filling perfectly.


Thursday, March 3, 2016

Potato Cheese Soup

Here is a "Souper" easy Crockpot Soup for a cold day. I love potato cheese soup, I could eat it every day and be happy. I found this recipe and modified it to my liking. 

Ingredients:
  • 1 bag of Ore-Ida Diced hash browns
  • 4 cups of chicken Broth
  • 1 box/can of Condensed Cream of Chicken soup (I used Pacific Brand)
  • 1 cup shredded Sharp Cheddar Cheese
  • 1 container of cream cheese
  • 1tsp of McCormick's Bacon Chive seasoning
  • 2 tsps of corn starch (Optional)

 Directions:
  1. Pop the bag of diced hash browns in the crockpot.
  2. Add the chicken broth and condense chicken soup to the pot and turn on High.
  3. Add in the McComick's Bacon Chive seasoning.
  4. Cook in the crockpot on High for 3 hours.
  5. At 3 hours add slices of the cream cheese and 1 cup of shredded cheddar cheese to the mixture and mix well.
    1. Set timer for 1 hour and stir every 20 minutes
  6. If after 1 more hour the soup is not to the desired thickness, add in 2 tsps of corn starch and let it cook for 20 more minutes. 
  7. Once to the desired thickness you can serve. It's up to you if you want to garnish with any chives, or extra cheese. 

Friday, January 29, 2016

Meatloaf Ala Gluten Free

Gluten Free Meatloaf - 

Ingredients:
  • 1.5 lbs Ground Beef
  • 6 oz Gluten Free Stuffing Mix
  • 2 Eggs
  • 1/2 cup water
  • 1/2 cup Ketchup
  • 1/2 cup BBQ Sauce
  • 3TBS of Worcester
  • Onion chopped
  • Tsp Garlic
  • 4 slices sharp Cheddar cheese

Directions:
  1. You will want to mix Ground Beef, Stuffing, Eggs, water and Worcester sauce and chopped onion together in a bowl.
  2. In a separate bowl mix the BBQ Sauce, Ketchup and Garlic. 
  3. split the mixture into two halves. 
  4. Work the 1st half into the bottom of your pan and poor on half the BBQ sauce mixture on this layer.
  5. Add the 4 slices of the cheddar cheese on the bbq sauce mixture.
  6.  Work the 2nd half of the meat mixture on the previous layer in the pan.
  7. Add remaining BBQ Sauce mixture to the top and place in the oven.
  8. Bake at 375 degrees for 1 hour
I improvised and used a round [pan instead of a loaf pan, but it all tastes the same in the long run!
Served with home made mashed potatoes, Viola! a great meal for a cold night in!


Wednesday, January 20, 2016

Stuffed Peppers

Gluten Free Stuffed Pepper 

Honestly I'm not sure I ever had stuffed peppers growing up. So I found it interesting i started to crave these one day. 1st off the Green peppers are the cheapest of the large bell peppers to buy. But the other colors looked so yummy I had to try them out. But you can use any color pepper you want. 


Ingredients:
  • 1 cup of Rice (Cooked and cooled)
  • 1 lb Ground beef
  • 1/2 cup of mushrooms
  • 1/2 cup of corn
  • 1 cup of diced tomatoes
  • 1 can tomato sauce
  • 2 tsps garlic salt
  • 1 tsp basil
  • 1 cup your favorite shredded cheese 

Directions:
  1.  You will want to boil the peppers for about 15 minutes to make them softer.
  2. While boiling the peppers, brown your meat, and dispose of the grease. You want the meat cooked before you bake the peppers.
  3. Once you've drained the grease, add Garlic Salt, Basil, corn and mushrooms to the pan and cook a little longer. 
  4. Heat up the sauce and half the diced tomatoes.
  5. Once the meat has cooked another 10 minutes mix in the rice and the balance of the diced tomatoes. 
  6. You can now "Stuff" the filling inside the peppers. Make sure to really fill in the bottom of the peppers. 
  7. Cover the top of the pan with foil and bake in the oven for 15 minutes at 350 degrees. 
  8. After 15 minutes remove the foil, and sprinkle with cheese. Bake for another 10 minutes.

Once the peppers are done the sauce will be warmed up, you can now serve the pepper and top with as much or as little tomato sauce as you please. Really the hardest part of this recipe is the time involved to cook each part before you actually make any stuffed peppers.